Sick of drawing the same five things with sidewalk chalk? Need some new inspiration? Here are some creative ways to use standard sidewalk chalk this summer that also keep your kiddos engaged and having fun!
It’s basically summertime and that means we are breaking out all the outdoor activities. Here in Minnesota, we wait allllll winter for our three to four solid months of summer.
One of the first things that comes out when the snow is off the driveway is the sidewalk chalk. The first bright drawing of hippie flowers, a big sunshine, a 90’s S, and a huge hopscotch always gives me major summertime vibes.
But after a few weeks and a few rainshowers, it starts to become a little…boring. Dull. Repetitive. My mom imagination dries up before the first two weeks of summer are over because I’m already losing steam trying to make it “the best summer ever” and I went way too hard the first couple of weeks and now I’m tired.
If this sounds familiar to you (hi, friend!), then read on because this year I put on my thinking cap before summer hit to come up with some sidewalk chalk ideas that are fun and engaging, and don’t take too long to create.
Let’s dive in!

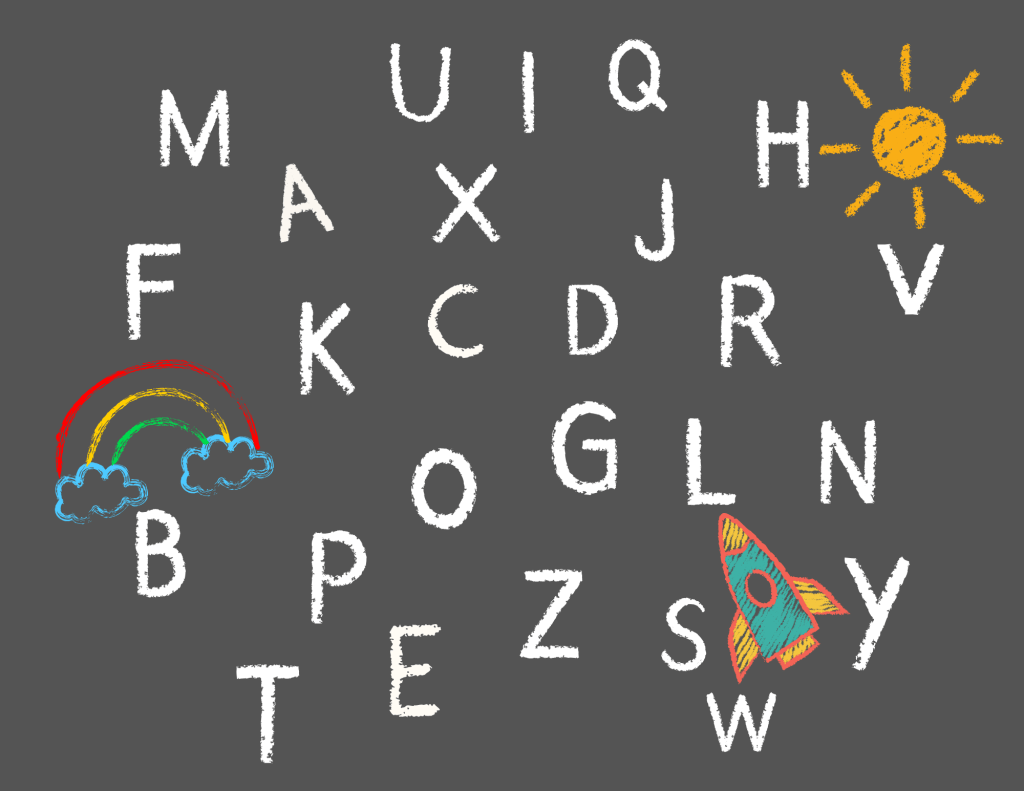
I had this idea last year when I was teaching my then-toddler her ABC’s.
Rather than sit her down at the table with a workbook (which was working but she and I were getting bored) I decided to try something more engaging and entertaining. She loved it because it felt like a game, and I loved it because it got us outside and is interactive.
This summer, she is not only identifying the letters but also using chalk to practice writing her letters. Here’s the game we are playing this year:
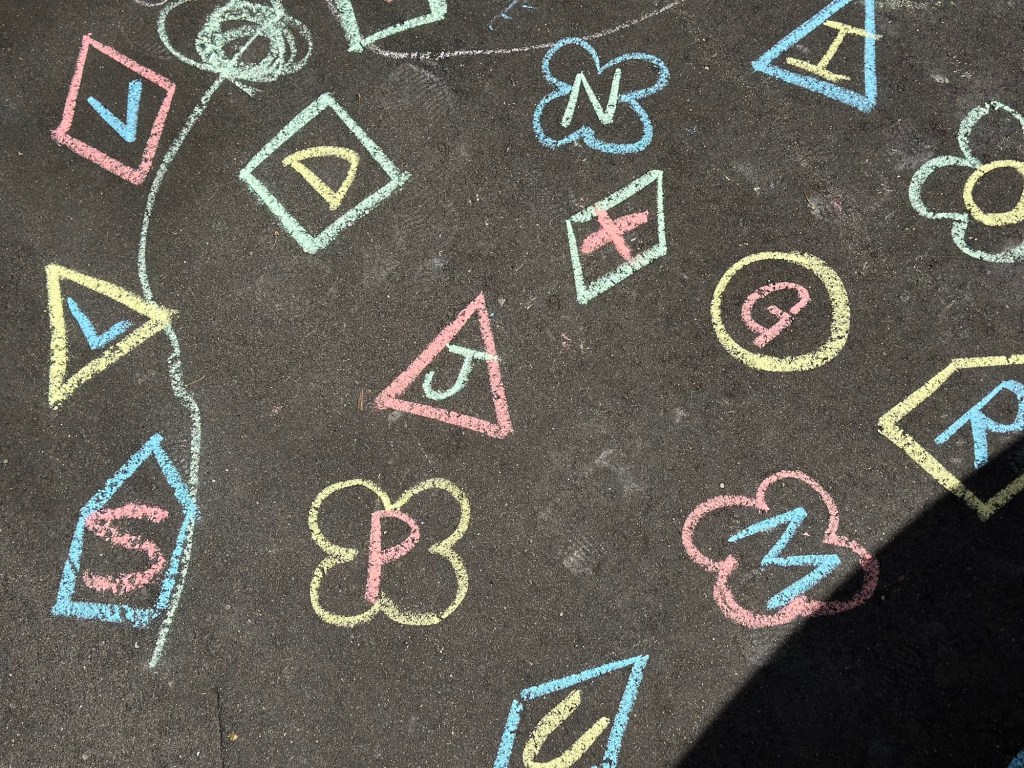
- Start by using chalk to write out all 26 letters. You can do it in order or all jumbled up random. I like to do it random so her brain works a little harder instead of relying on the ABC pattern that she’s been taught. I use circles or a combination of different shapes to put the letters in.
- Make sure you leave room for them to be able to write their own letter for writing practice. If you’re just doing letter identification, you can make them as big and bold as you want.
- Once I have them all on the driveway, I let her choose her own piece of chalk to use.
- Then, I call out a letter for her to find. Once she finds it, she has to write the letter next to the one I’ve already written.
We do this until she gets bored or tired, or until we’ve done all 26 letters. You can also do lower case letters alongside the upper case, or just lower case if that needs more work than upper case.
I have also done this with numbers as she learned 1-20. She can now count to 100, but identifying the numbers needs some practice, so we’ll be doing variations of 20-100 this summer.
You can do this type of chalk game with anything your kiddo needs to practice. Sight words, simple addition or subtraction, multiplication or division, fractions, or do a variety of them and call out the answer (ex: “the answer is four!” and they run to 3+1, OR call out “3+1!” and they run to the number 4). It keeps them sharp over summer break before the school year starts again or helps them improve on anything they had a hard time with during the school year.
The options are truly endless. The point is that it is engaging and interactive outside in the sunshine. Like many of us in the Midwest, I don’t like to waste summer sunshine so we are up and at it early and outside as soon as possible, for as long as possible.

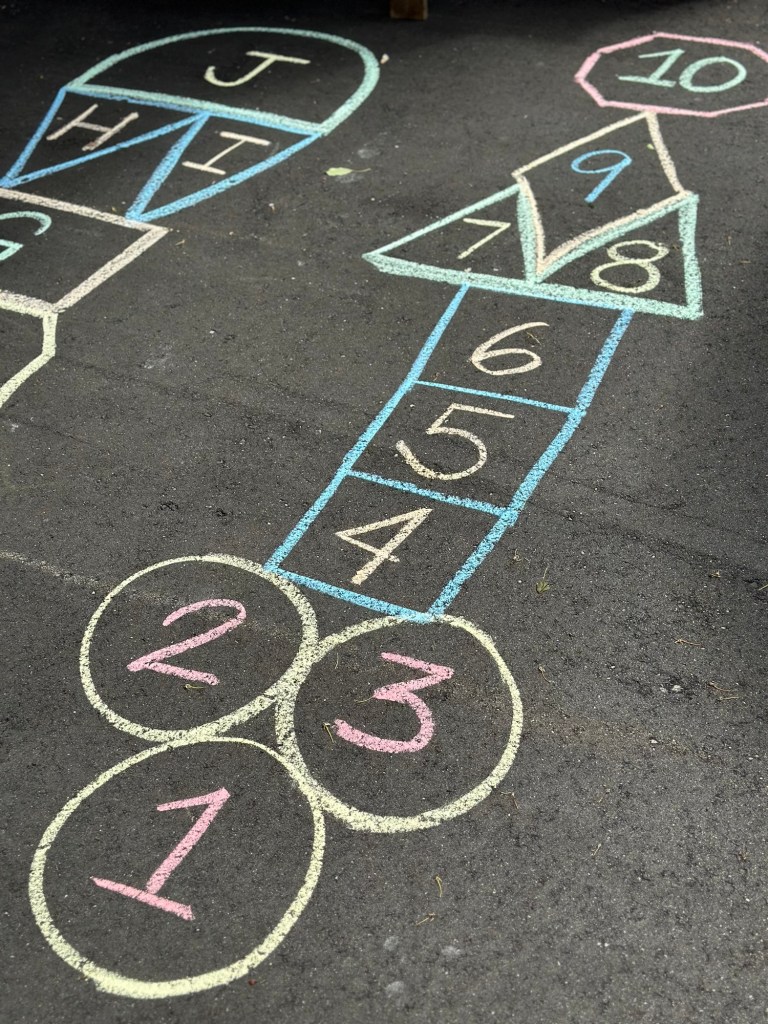
Hopscotch is something I taught Viv when we were working on those fine motor skills and trying to get her to hop on one foot. It worked but, I’ll admit, traditional 1-10 hopscotch gets pretty dull after awhile. Especially if you aren’t even playing with a rock and just jumping the squares and calling out the numbers with your toddler over and over again.
This year, I remembered that I have free will and that not all hopscotch has to be boring squares…or even numbers.
If, like me, you are bored and exhausted of normal hopscotch, try doing one that has different shapes instead of just squares. Give it a try 1-10 first, but then when you take your turn again, instead of saying the numbers, say the name of the shape out loud as you jump (circle, circle, square, square, square, triangle, diamond, octagon).
Or you could call out the color. Or in Spanish. You can make it as easy or challenging as you want for your littles. We often have a couple different ones on the driveway at one time, as seen below.
Viv lost her mind when I did this the first time giggling and laughing and wanted to try it that way herself. I think maybe she was a little bored and tired of the same old hopscotch too and welcomed the change. Now we work together and she tells me if we should do different shapes or numbers or letters, etc.
Since then we have also done ABC hopscotch instead of numbers. It is actually comical watching Viv do this because her natural instinct is to sing it like the ABC’s instead of how her feet land (A, B, C, D vs. A, BC, D, EF, G, HI, J).
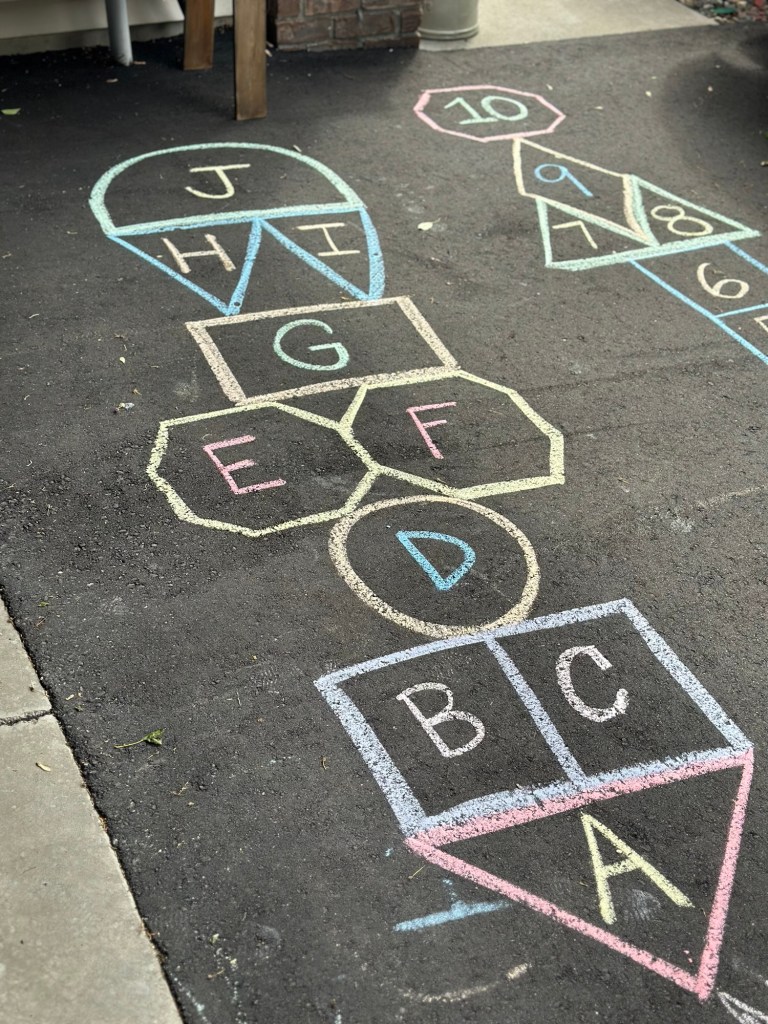
We did this with her 10-year old cousins too and they also initially tried to sing it instead of follow the pattern. We all had a good laugh and they eventually got out of their brain rut, but it was this small little tweak that made their brain work a little harder than usual.

This one may be obvious, or something you’ve already exhausted too, but my four-year-old is super into it right now. She loves tracing her hands or feet and then decorating the outlines by coloring them, adding fingernails or toenails and “nail polish,” rings, bracelets, “tattoos,” etc.
We also recently did a full body outline and she added a face, clothes, hair, etc. You could do a fun family portrait on your driveway with everyone’s outline and then have the kiddos decorate each of them.
You could even take it a step further and use nature things like leaves, pinecones, rocks, etc. to decorate each of them (pro tip: leaves work great for skirts and dresses and rocks make great necklaces and bracelets).
I’ve also seen others use blue painter’s tape to make a fun pattern, like a mosaic or stained glass, and then color in around the tape so that when you lift the tape, it makes a pretty image. You can Google “chalk mosaic with blue tape” or something to that effect to see what I’m talking about.
We have yet to try this, but it’s on my list and in my back pocket for when we need something new to try.

Have you ever seen people take pictures with forced perspective? Like they’re holding the sun in the palm of their hand or pinching it to make it look really small? Or “holding up” a building, but the building is actually just far away in the distance?
You could do this with chalk by drawing a huge dinosaur or big foot and having your kiddo lay under it on the driveway like it’s going to step on them. Take a few photos for fun and you could even print them out and hang them in their rooms.
Other ideas:
- “holding” a bunch of balloons and pretending like their flying away
- “holding” an umbrella
- drawing a huge, fun hat for them to “wear” when they lay on the ground
- draw a raft for them to “float” on under a palm tree
- a butterfly that can “land” on their nose
- huge butterfly or dragon wings so when they lay down, it looks like they have wings
- “riding” a unicorn
Again, the options are endless. Don’t forget to take the photos! Even if you don’t print them out, they’ll be excited to show Grandma, or the neighbors, or Dad when he gets home from work.
Maybe you’re reading this going, “Okay, Naomi? I’m not a dang artist.” Girl, me either. But do your best and choose something easy (I suggest the butterfly wings or balloons). Your kiddos will think it’s cool, especially after you take the photo and they see it looks like they’re holding the balloons, being stepped on by a huge foot, or have big butterfly wings.
I’ll gently remind you that it’s not about being an artist, it’s about having fun and creating a fun experience with your kiddos. Chances are they’ll get in on it too with their own wild and creative ideas, and say, “take a picture of me!”

When I was a kiddo, one of my favorite things to do was to map out a “road” with chalk so I could ride my bike on it. We didn’t have an enormous driveway, but it was big enough to have a good sized map that I could navigate with a scooter, bike, or rollerblades.
I also added trees, houses, buildings and businesses, and my own “house” that I could return to along the roads.
If you don’t have that kind of space, or you’re out of space from doing other activities, you could do a smaller version of a road for toy cars and trucks. Your littles can “drive” them on the map and park them at different spots.
Last summer, I created a farm setting for all of Viv’s outdoor farm vehicles. She loved it and played on it for days until the rain washed it away, and then we created a new setting for her cars and trucks to drive on.

I can’t take credit for this one because my nephews absolutely took my creative hopscotch idea and built off it to create a crazy, over-the-top obstacle course…using chalk.
It was a brilliant idea and I feel compelled to share with you because it kept them (and Viv) busy for about an hour just creating it, and then five or six times through it once they finish. Over the course of the day, they went back to it and added things they thought of or just did the course over and over again.
It started as hopscotch, and then morphed into hopping on “bubbles,” jumping over “lava,” then “rowing the boat” to the tropical island, then following the twisty line maze to the fire station where you have to “ring the bell” and then finally hopping on one foot to the “finish line” to win.
Or something to that effect.
Using chalk to make a line maze they can follow that loops and turns, or pretend “bubbles” to “pop,” and then hopping in a rowboat while you sing “row row row your boat” to a finish line is fun, imaginative, and allows them to race or even take turns with a stopwatch to see who can do it the fastest, or see if they can beat their own time.
In this case, they took one of my ideas and just built on it with their own imaginations. Which, honestly, is the coolest. However wild and crazy their ideas are, it’s a great outlet! Even if you have to take the lead, ask your kiddo, “what should we add next?” and see what they come up with.

These are just some ideas to get you going through at least the first week or two of summer, but are also easily repeated and able to be cycled through whenever one idea gets stale.
I think the biggest thing I’ve learned is to just keep it simple.
Sidewalk chalk itself is such a simple thing, it feels a little silly to overcomplicate it. But it’s easy for us to overcomplicate things when we are reaching for ideas and losing our minds trying to entertain our little ones.
It’s also so cheap, so I never feel bad if we go through it and have to buy a new box.
I know there are a ton of other chalk options out there now, like neons, chalk paint, and even stencils. And if that’s your thing, then absolutely go for it!
I just find that we have more options, easy cleanup and storage, and less complications with a plain ol’ bucket of sidewalk chalk in five colors.
I hope you find joy in these ideas and have some summer fun with your little ones trying them out!
Until next time,


Leave a comment